building a 3 tier ,gravity ,electric brew stand/cart, simplistic approach.

Homebrew Talk - Beer, Wine, Mead, & Cider Brewing Discussion Forum

Help Support Homebrew Talk - Beer, Wine, Mead, & Cider Brewing Discussion Forum:

This site may earn a commission from merchant affiliate links, including eBay, Amazon, and others.

Soulshine2

Well-Known Member
Joined
Jan 28, 2017
Messages
2,216
Reaction score
1,093
Location
Grant
I have been working (union millwright) my butt off for 5 months and now that I'm laid off I have time to bring my brew stand to fruition . I only brew 5-6 gallon batches and not very often so I'm not looking to invest a whole lot of money into this. I've brewed a couple good batches so far so I know what basic supplies I need to brew , those I own already . Just wanting to incorporate it into a roll around or somewhat mobile unit so I can push it up to the wall out of the way in the basement when Im not brewing.
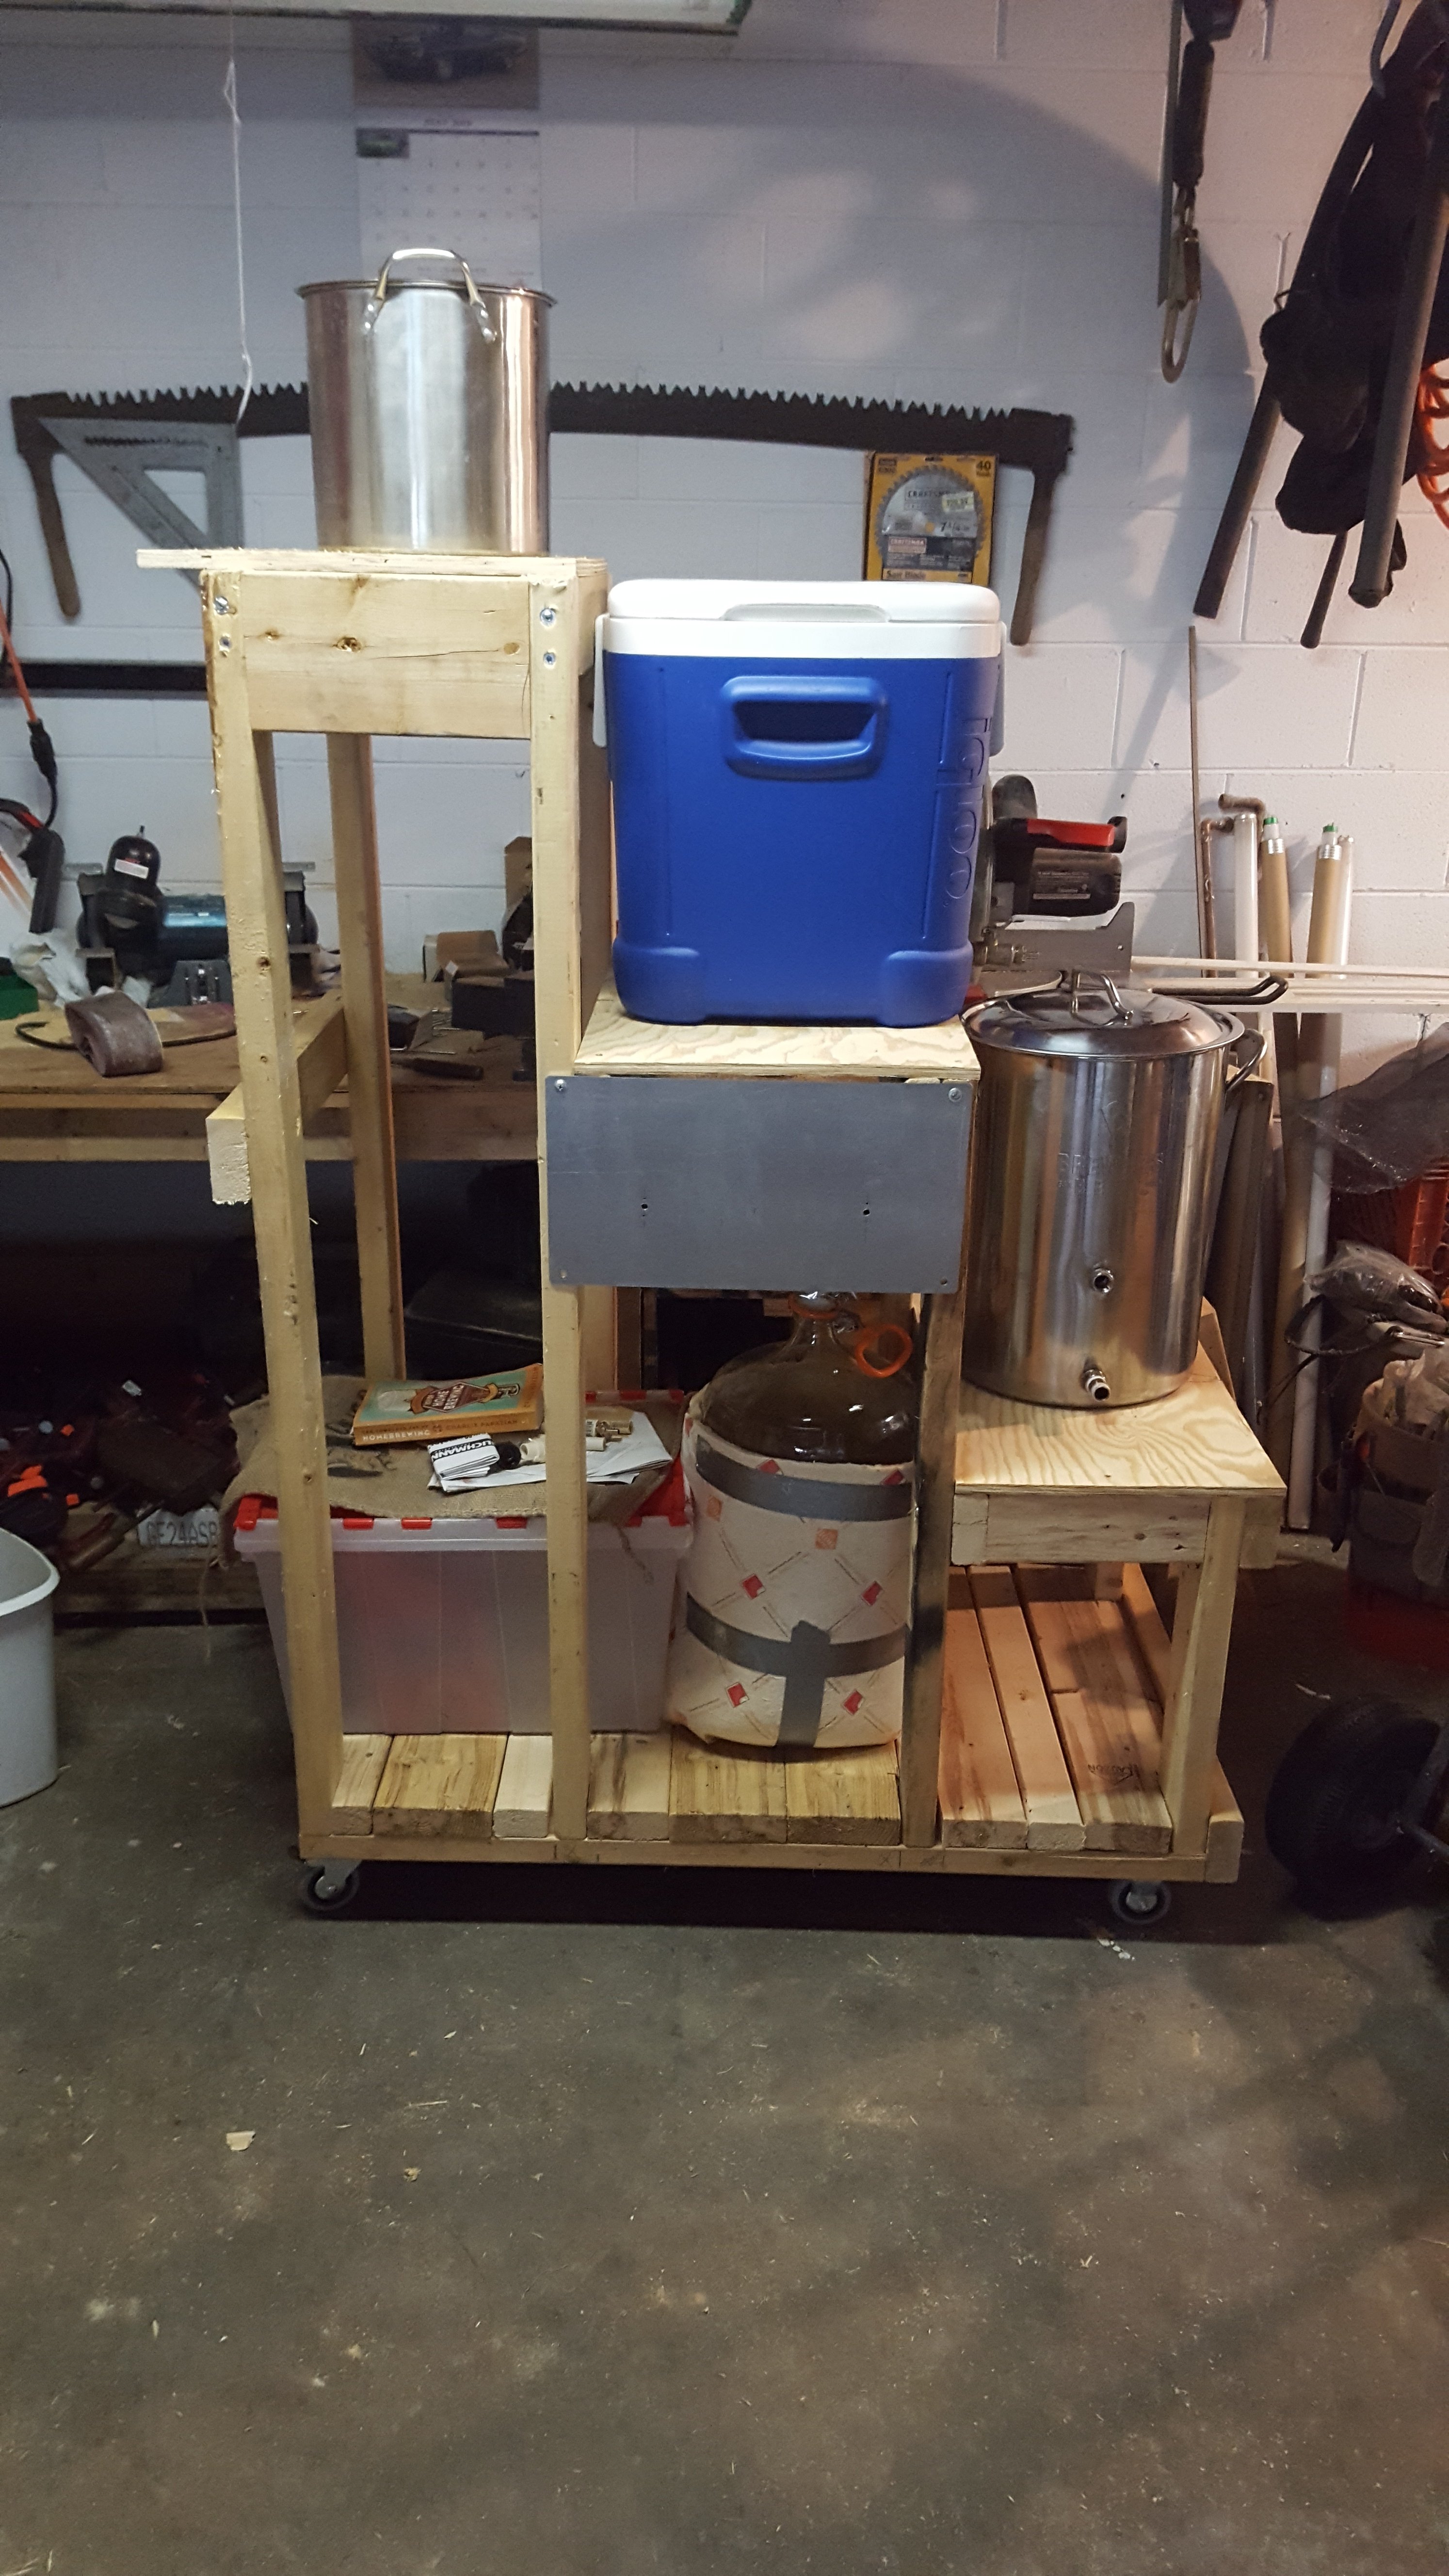
Heres what I have come up with so far.
My 6 gallon carboy is 23 inches tall , this can just sit on the floor on top of some 1/4 inch rubber mat I picked up on a job .
my boil kettle is 18 inches tall with the drain spout being about 2 inches up from the bottom.
Mash tun (igloo ice cube cooler ) is also 18 inches with the spout 2 inches up. So if I build the tier levels at actual vessel heights, it would put the height of my strike/sparge water tier at 60 inches above the floor. A little tall but for lifting 3 gallons(cold) its not bad.
I have a small apartment/dorm sized electric stove that I am planning on taking apart to use a small element at the top for strike and sparge water heating while taking the largest burner to put on the lowest tier to the boil kettle. put a burner control panel under the mash tun. Gravity moves the water/wort one tier to the next. I figure the whole rig ,end to end ,only needs to be like 36 inches if the top tier sits directly over the bottom tier. depth about the same then I can make a step to reach or see the top of the strike water kettle .
I have water/drain and electric service in the basement already . I just need to figure out how to rework all of the wiring for the electric element burners and control knobs. My construction will probably be wood and topped with 1/8" steel sheet to drop the burners into like a sink is in a countertop. I might even cover the sheet steel with some dur-rock/tile for heat shielding.
I looked at Mike C's rig yesterday and I really like it.
I commented but his (then new) rig was posted 10 years ago ,is he still around ?
 
I built my stand out of 2x4s and scrap plywood. Start from the ground as you planned. Measure so each spigot is above the top of each receiving vessel.

Before incorporating the electric burners do a run to see if it will boil water and how long it takes. For a 5 gallon batch you will have to boil 6.5 to 7.5 gallons of water. Heating to mash temperature may be easier but it might take a very long time.
Make sure your electricity is protected with a GFCI outlet and everything it properly grounded. Electricity and water do not play together nicely, at least when a human is added to the mix.

Get an RV hose to fill your HLT. Then you don't have to lift anything heavier than the spent grain until moving your fermenter into it's cool/warm space.

20150924_100155.jpg


The pipe along the ceiling is for filling the HLT. You can see a filter on the wall to the right. I didn't have it on wheels there because it was on an enclosed porch and stayed there all the time. Btw, plenty of windows to open when using the propane.
 
Thats exactly how i planned to set it up. Pretty much a clone of yours, except electric.wuth water fill off the ceiling. Great minds think alike. Im glad you posted that pic.
Prost!
 
Thats exactly how i planned to set it up. Pretty much a clone of yours, except electric.wuth water fill off the ceiling. Great minds think alike. Im glad you posted that pic.
Prost!
You might take a look at the modular wire shelving at a diy store. The kind with tapered bushings for shelf height adjustment. They have add-on casters available, to make them easily movable.
 
You might take a look at the modular wire shelving at a diy store. The kind with tapered bushings for shelf height adjustment. They have add-on casters available, to make them easily movable.
i have some ,although I wouldn't trust a 7 gallon(almost 60 lbs) pot of near boiling water on it.
 
i have some ,although I wouldn't trust a 7 gallon(almost 60 lbs) pot of near boiling water on it.
Yeah, I sure see that. I use mine for everything except the kettle while boiling. That sits on my old jet burner. It makes a good stand, even though the heat is electric. I fill by gravity and drain via pump, so I never have to move a hot kettle.
 
I built my stand out of 2x4s and scrap plywood. Start from the ground as you planned. Measure so each spigot is above the top of each receiving vessel.

Before incorporating the electric burners do a run to see if it will boil water and how long it takes. For a 5 gallon batch you will have to boil 6.5 to 7.5 gallons of water. Heating to mash temperature may be easier but it might take a very long time.
Make sure your electricity is protected with a GFCI outlet and everything it properly grounded. Electricity and water do not play together nicely, at least when a human is added to the mix.

Get an RV hose to fill your HLT. Then you don't have to lift anything heavier than the spent grain until moving your fermenter into it's cool/warm space.

View attachment 581956

The pipe along the ceiling is for filling the HLT. You can see a filter on the wall to the right. I didn't have it on wheels there because it was on an enclosed porch and stayed there all the time. Btw, plenty of windows to open when using the propane.
I hope this picture shows up good. I built this this morning. Not finished yet of course , need to scavenge the electric elements .that panel will support the control knobs . I set the pots and tun to show . Its on wheels too.
 

Attachments

  • 20180804_122704.jpg
    20180804_122704.jpg
    1.9 MB · Views: 915
I took my donor apartment sized electric stove apart over the weekend which was also my 51st birthday on Saturday. I was very surprised to see how simple an older model electric stove is built. Pretty much the power cord comes in and each side gets split off to the simple 3 pole power block grounded to the stove back, and from there to the rheostats and on to the elements. I'm sure if this was a modern digital unit it'd be more difficult but this was a basic unit . The schematic on the back revealed the wiring is only 14 and 16 gauge . The one large burner control was a higher power than the other 3 and likewise , the element block, so I made sure to mark those and the wires and the block as to what went where and pretty much took the harness out of it intact. Since I didnt intend on using neither the broiler nor the oven heating element ,those were just spade terminals to unhook and eventually wires to cut off and discard. The photo I took after the rough build shows I had plywood installed temporarily on the heat element locations to mock up the surface height differences in order to see the gravity/elevation differences between the vessels.
Yesterday I purchased a sheet of 1/4" Hardiboard tile backer to replace the plywood . Easy to cut to size , cut holes to accept the heat elements while giving the surface a heat resistance . I used double layers (1/2") to take the weight of both strike and a full boil kettle.
I used an electric hand grinder and a cutting disk to cut the range top apart . The holes cut in the hardiboard to accept these element cut outs . As I said before , I had taken the wiring harness apart intact so the thin sheet steel control panel was drilled to accept the control knobs AND I also drilled a hole in the center of the panel to accept the red indicator light that shows when one of the elements is powered and in use. Since the original configuration of the stove used the carcass as a common ground and my brew rig is made of non-conducting wood ,I ran a ground wire between the element cut outs to tie everything together . Everything is securely nutted at junctions and taped ,which I plan on getting some of that surface mount conduit to contain the wiring. Right now its secured to the structure with the same loom loops that came out of the stove. Another piece of Hardiboard used to cover the main power block and to shield the structure under the mashtun station from any splash or heat generated by the BK element that may melt my plastic mash tun .
I plugged it in , turned the element controls ,the red "in use" indicator light came on, the elements came on quickly ...it works wonderfully.
I'm so excited and cant wait to get this mobile rig into its first beer production. In the meantime ,I'll paint it and might even add some small cheap tile to the heat element surfaces for ease of cleaning.
 
Did you do a test to see if the stove element is hot enough to boil 7 - 8 gallons of water? I would check before you spend all your time only to find out it will not bring your wort to a boil.
 
Did you do a test to see if the stove element is hot enough to boil 7 - 8 gallons of water? I would check before you spend all your time only to find out it will not bring your wort to a boil.
No, I have no reason to doubt it will. it was a perfectly working stove.
 
Did you do a test to see if the stove element is hot enough to boil 7 - 8 gallons of water? I would check before you spend all your time only to find out it will not bring your wort to a boil.
Just because your post got me thinking AND my American Brown Ale kit got here this morning , SO I decided to put the cart through her paces with water only and see . First off my basement circuit is only a 30 amp 220 . It heated but slowly and not very high ,barely got to 122*F. I pushed it the 40 ft out to the polebarn where the 50 amp outlet is , wow , water heats up just fine and boils pretty quickly only something happened I never considered...I Had my probe thermometer in the BK . It boiled at 206*F instead of 212*F. I completely forgot about our elevation . I was so used to living 50 yrs at around 326 ft above sea level . We're on top of this small mountain at 1300+ ft . Didn't realize the difference until now. I would have asked how this will affect my brewing but having since already done one and turned out fine ,I wont worry about it.
 
Back
Top