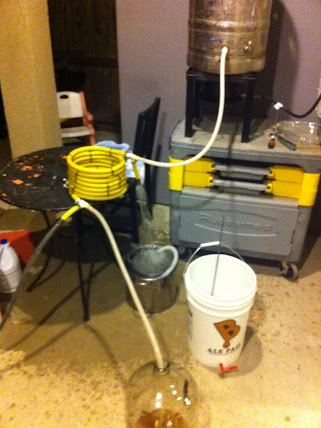
I know I know...another counterflow chiller. I'm hoping that mine shows a little more affordability than even some of the cheaper versions out there. There were few things that I wanted to do with this chiller
1. Not solder anything
2. Use as little expensive copper as possible
3. Use or re-use as many materials on hand as possible (cheap)
So that being said, here is my material list:
1. Used 5/8" garden hose with both ends in good condition $0.00
2. 20' 3/8" OD soft copper $25.86
3. A few inches of 1/2" CPVC $0.00 left over from mash manifold build
4. 2 CPVC 1/2" t's $.50
5. 2 CPVC 1/2" compression sleeves, not sure what these things are for but they have a hole in the center that is 3/8"...perfect $.50
6. 2 part Epoxy $3.50
7. CPVC glue $3.00
8. 4 stainless clamps $4.00
If I didn't have to by glue, this would have been dirt cheap.
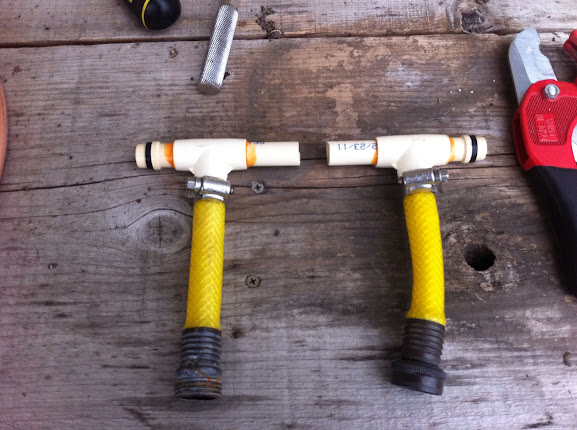
The first thing I did was glue the compression sleeves into the cpvc t's.
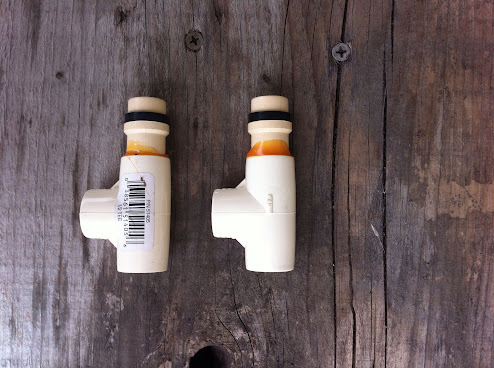
Then added a couple short pieces of 1/2" cpvc stubs from the t's
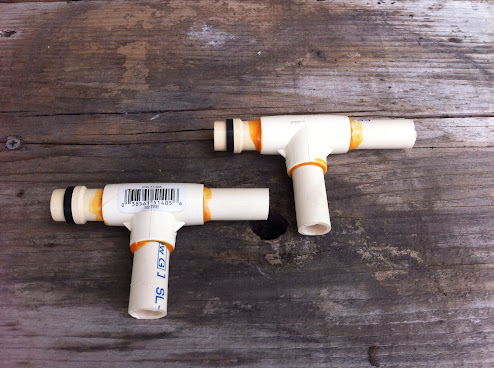
I cut about 6" of hose off with the fittings and sleeved it right over the stub outs. It fit perfect.
Then I measured out about 19.5' of hose and cut that to sleeve the copper into.
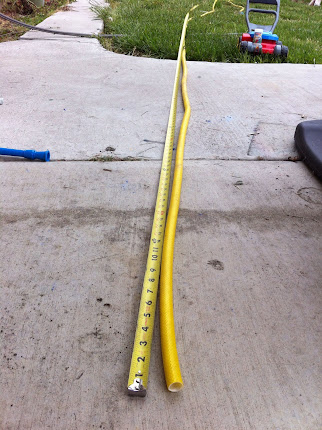
Then started shoving the copper down the hose. This was way easier than I was anticipating.

Once that was done I secured one end of the copper to the fittings I built with the 2 part epoxy. Leaving about an inch and a half to slide hose over during transfers.

Slid the hose over the end of the fitting and clamped it down.
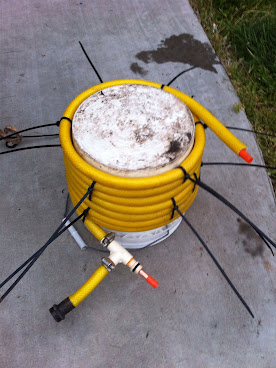
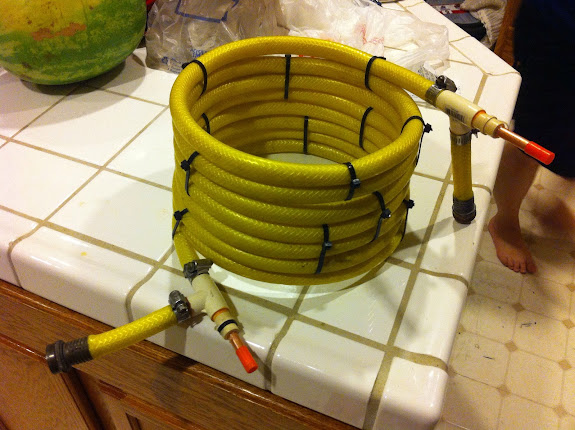
Now the fun part. I used a 2 or 2.5 gallon bucket to coil the hose around. I had my daughter stand on top of the bucket, shes roughly about 55 pounds, and I had my wife hold the beginning of the coil with her foot. I zip tied every 3 coils together on 3 sides all the way up. Overlapping ties.
Once it was all coiled up I measured how much hose I needed to cut off to get the correct amount of copper exposed before I installed the last fitting.
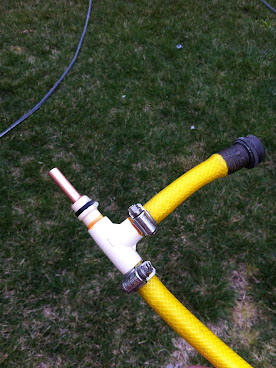
After I made the cut I slid the fitting over the copper and compressed the hose so that about 3" of copper was exposed. I coated the copper with epoxy and let the hose push it back into place, so that only an inch and a half was showing. And clamped it down.
Closer view, you can see the epoxy is pooled around the fitting well. Hopefully it won't leak.

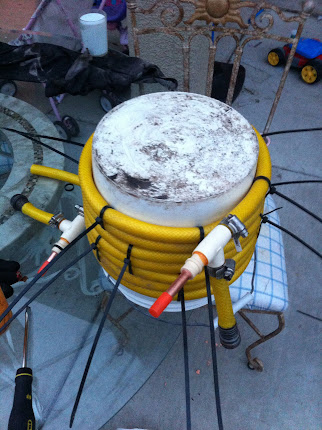
And here it is completed. I left the plugs that the copper came with in place to protect it. Any reason I couldn't fill it with star san and store it that way with the caps on. How does copper react with that sanitizer?
I think the whole build would have cost about $30 if I didn't need to buy the glue and epoxy. I'll be brewing this week some time and I'll let you guys know if it leaks and how efficient it is.
1. Not solder anything
2. Use as little expensive copper as possible
3. Use or re-use as many materials on hand as possible (cheap)
So that being said, here is my material list:
1. Used 5/8" garden hose with both ends in good condition $0.00
2. 20' 3/8" OD soft copper $25.86
3. A few inches of 1/2" CPVC $0.00 left over from mash manifold build
4. 2 CPVC 1/2" t's $.50
5. 2 CPVC 1/2" compression sleeves, not sure what these things are for but they have a hole in the center that is 3/8"...perfect $.50
6. 2 part Epoxy $3.50
7. CPVC glue $3.00
8. 4 stainless clamps $4.00
If I didn't have to by glue, this would have been dirt cheap.
The first thing I did was glue the compression sleeves into the cpvc t's.
Then added a couple short pieces of 1/2" cpvc stubs from the t's
I cut about 6" of hose off with the fittings and sleeved it right over the stub outs. It fit perfect.
Then I measured out about 19.5' of hose and cut that to sleeve the copper into.
Then started shoving the copper down the hose. This was way easier than I was anticipating.
Once that was done I secured one end of the copper to the fittings I built with the 2 part epoxy. Leaving about an inch and a half to slide hose over during transfers.
Slid the hose over the end of the fitting and clamped it down.
Now the fun part. I used a 2 or 2.5 gallon bucket to coil the hose around. I had my daughter stand on top of the bucket, shes roughly about 55 pounds, and I had my wife hold the beginning of the coil with her foot. I zip tied every 3 coils together on 3 sides all the way up. Overlapping ties.
Once it was all coiled up I measured how much hose I needed to cut off to get the correct amount of copper exposed before I installed the last fitting.
After I made the cut I slid the fitting over the copper and compressed the hose so that about 3" of copper was exposed. I coated the copper with epoxy and let the hose push it back into place, so that only an inch and a half was showing. And clamped it down.
Closer view, you can see the epoxy is pooled around the fitting well. Hopefully it won't leak.
And here it is completed. I left the plugs that the copper came with in place to protect it. Any reason I couldn't fill it with star san and store it that way with the caps on. How does copper react with that sanitizer?
I think the whole build would have cost about $30 if I didn't need to buy the glue and epoxy. I'll be brewing this week some time and I'll let you guys know if it leaks and how efficient it is.