Keezer collar attachment

Homebrew Talk - Beer, Wine, Mead, & Cider Brewing Discussion Forum

Help Support Homebrew Talk - Beer, Wine, Mead, & Cider Brewing Discussion Forum:

This site may earn a commission from merchant affiliate links, including eBay, Amazon, and others.

Aschecte

Brewtus Maximus
HBT Supporter
Joined
Feb 20, 2011
Messages
1,673
Reaction score
64
Location
Florida
Ok I just built my first keezer ( well for the most part ) ...... I'm at the point that I will be attaching the collar to the freezer base.... I will be using small angle cleats as a reenforcment to whatever adhesive I use. And that is wherein my question is... what type of adhesive are most of you all using ? I walked through my local Lowes and I see adhesive caulking for tile/tub - wood-wood platic-plastic but obviously we are going from wood to plastic so what are we using here ? If you know the brand / model / specific name that would be a huge plus. Thanks in advance for your help. :mug:
 
I just used window and door caulk. Put a nice bead around the top of the freezer and set the collar on and applied a bit of weight to set it evenly. Worked fine.
 
I used good ole clear silicone caulk, for mine i used 2 tubes like a 1/4 inch bead all around, my lid is attached to my collar and I have picked up my keezer while holding onto the collar. It didn't budge that stuff is stronger than it looks.
 
I used a closed cell foam seal just a camper top on a pickup truck. I didn't fasten it to the freezer at all. It has a1/2" overlap all the way around and 1/8 clearance for size. It just sits on top and the lid hinges bolt to the wood collar. It works great. I was prepared to glue it down somehow, but gravity is all I needed...
 
I wouldn't seal it unless I had to. Then I would use silicone caulk and keep it removable in case it was absolutely necessary. Just pressure/gravity fit it. Self adhesive weatherstripping would be good.
 
Weather sealing went through my mind as well but what would keep for example a 4 year old from pulling it off the freezer body if he got interested in pulling on the collar ?
 
I just put on mine with weatherstripping and a bracket in the back. Honestly, I don't think it even needs the bracket in the back. The weatherstripping has crazy amounts of friction. I was lucky I placed it in the right spot on the first try because I couldn't even move it without pulling it straight vertically off first.
 
Would weather seal like in this photo work ? Is this what everyone is referring to ?

image-854614162.jpg
 
I could be wrong, but I believe that's the exact stuff I used.


Yeah this stuff is 11/4 wide by 7/8 thick which with the weight of the collar should compress it pretty good..... I think I like the idea of the weatherstripping better than the caulk as it gives the option of removing the collar if I ever need to for any reason..... for that matter I'll try the weather strip and if I don't like it / it doesn't work out it's easy enough to remove and go back to the caulk idea..... Thanks for all the help everyone... I'll post some pics of where I'm at so far in the next post.
 
I have done a lot more staining and sealing since these photos but tomorrow I am reattaching the lid and sealing her down to the freezer body so thanks for all the advice.

image-1734865229.jpg


image-3528071875.jpg


image-3041843001.jpg


image-882945934.jpg


image-1486880629.jpg


image-4253057711.jpg
 
Aschecte said:
Yeah this stuff is 11/4 wide by 7/8 thick which with the weight of the collar should compress it pretty good..... I think I like the idea of the weatherstripping better than the caulk as it gives the option of removing the collar if I ever need to for any reason..... for that matter I'll try the weather strip and if I don't like it / it doesn't work out it's easy enough to remove and go back to the caulk idea..... Thanks for all the help everyone... I'll post some pics of where I'm at so far in the next post.

One thing I did that may or may not have helped it was wipe down both surfaces where the weatherstripping was going with rubbing alcohol.
 
I used the "gravity and friction" method myself..

The "inner ring" of the collar is 2x6's, and the "outer ring" is some 1x12 "utility shelving", both from Lowes.

I used 3/4" wide (I think.. it was the widest I could find) self-adhering weatherstripping on the 2x6's, placed that onto the keezer, then screwed the 1x12s to the 2x6's. Simple.

625478_10200809910598540_1368461085_n.jpg


31895_10200809910758544_700855550_n.jpg

(Please ignore the water and NA beer.. I was using it as "fluid filler" so I could get the temperature in the keezer balanced out...)
 
I used gravity and weather stripping, it does the trick, my collar must weight close to 30 lbs. IMO, no need to glue it to the chest freezer.
 
Ok here what I was able to come up with ... I used 5/4 x 6" wood so that's 11/4 depth..... The 11/4 weather strip was actually to big both in height and protruded way to much.... I tried to trim it but it looked like crap. So amazingly they don't carry 1" weather strip at my lowes or Home Depot so I went with 3/4" stripping..... Is this sufficient ? I pretty much centered it so there is a bit of a gap in the front and back but not by much..... Pics below tell me what you think if its ok like this or should I change it ? And to what ?

On the one photo it's from the inside and you can see what I mean by the gap that's still there ..... Won't this always condensation to wick under the collar ? Should I put a bead of caulk ? Should I just do something completely different ? This part is so damn frustrating to me ..... !!!

image-1131025136.jpg


image-1565253082.jpg


image-182971276.jpg


image-2618266492.jpg
 
Ok so here's where I'm at ... Couldn't use the 11/4 weatherstrip it didn't fit right so I had to use 3/4" stripping which was a bit to small.... No home centers seem to sell 1" which would probably have been perfect..... What's the verdicts on the pics below .... Take note of the internal one and the gap.... Should I bead this with caulk to prevent condensation from building up there or should I just take this stripping off and go a completely different route ? Thanks for the advice ..

image-389269824.jpg


image-1356703084.jpg
 
Ok I'll try and make a long story short..... I originally bought 11/4" weather strip as I was using 5/4" x 6" wood. It so happens the weather stripping was way to large and not only raised the collar noticeably but extended into the keezer substantially...... I went back to two home centers lowes and home depot neither carry 1" weather strip the next size down was 3/4" x 5/16" so I went with that nd kinda just centered it on the collar..as you can see in the photos yes it seals and is much less visible but now I'm concerned on the inside portion of the collar it is going to get condensation wicking under the part that does not have the seal on it.... is there a solution or this or just a straight up better idea or solution ? I originally was going to just use liquid nails or similar and just adhere it but I liked the suggestions of the stripping as it was a less permanent adherence... .. see pics below any advice is greatly appreciated !!! take particular note of the internal picture as it shows the gap I'm referring to. Thanks !!

keezer 1.jpeg


keezer2.jpeg


keezer3.jpeg


keezer4.jpeg


keezer5.jpeg
 
Looks fine to me.

I'm not sure if that picture of the internal part is doing it any justice...... it's is raised about 5/16" above the freezer and there is around a 1/4" gap where the weather strip does not go flush to the collar meaning there is a 1/4" or so of exposed collar wood raised 5/16" that when condensation builds will collect in that area and on that exposed wood Granted as those pictures show I'm not the best stainer or painter but I did stain the living sh*7 out of that collar and it is polyurethaned as well so there is a amount of water protection there I guess I'm just nervous about that internal 1/4" or so and water coming into contact and it either rotting , molding up or warping somehow hence my curiosity about caulking or even taking that weather strip off and going a different route. I just really want this to be a one time deal and to do it right the first time. Thanks for the input !!:mug:
 
nextgenxx said:
Weatherstripping and metal bracket in original hinge holes. Pretty damn solid and removable!

These pictures kinda support my fear...... In these pics it is sealed from the inside edge to about 1/8" on the outside ridge. Now if you look at my there is like a 1/4 gap on each side that's why I think there may be issues. I'm really mainly concerned about condensation build up....:/ may be I should just try putting the weather strip all the way to the inside edges of the collar and have a 3/4" gap in the front .... Or just do something completely different..... I'm really confused.
 
Ok I caved in my compromise is I attached the collar used the internal cleats but I am going to put a thick bead of caulk where the internal gap is .....so it has a "tighter" seal. Then ill mount the foam board attach my gas manifold set my temp controller hook up beverage lines and good to go. I hope.

image-1243297236.jpg


image-144186708.jpg


image-3540366077.jpg


image-2457902736.jpg
 
I have barely had any condensation build up because I also added 3/4" foam fridge insulation to the inside collar and also cut miter edges on the bottom so it would fit really snug.

image-3224536695.jpg
 
I wouldn't seal it unless I had to. Then I would use silicone caulk and keep it removable in case it was absolutely necessary. Just pressure/gravity fit it. Self adhesive weatherstripping would be good.

That's what I used, that way if had problems I could still get it repaired without voiding warranty. Or if I ever got away from brewing I could switch it back to a freezer. Without any damage to the freezer itself.

There was a guy on here last year who's freezer went on the fritz and even though it was underwarranty, they refused to cover the work because it had shown signs of "modification" iirc because of liquid nails residue or something like that.
 
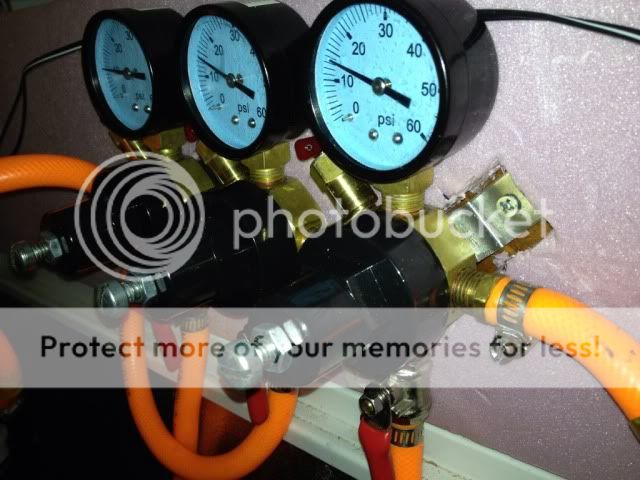
Ok if anyones still kinda sorta following this thread I have a new question maybe someone with greater knowledge / expierence can chime in on. I finally have the collar attached, I ended up caulking that gap and it looks good and I feel much better about how it seals..... but, my new question is this I have just installed foam board insulation to the collar and that went fairly well I only cut myself once. Do most of you attach your gas manifold to the insulation and use longer screws and tap into the wood behind, or for that matter just into the foam board or are you cutting out a spot on the insulation to leave a exposed piece of the collar ( just wood ) and mount on the wood leaving that portion uninsulated ? Thanks for any input...
 
I just carved out the 4 squares where the bracket extended in the foam, screwed it into the wood, and then, what I don't show for photo purposes is I wedged the foam piece I cut away back over the bracket.

8728A291-B877-4E6A-B110-D6394ADEB0B6-1948-00000502F1158273_zps40078f58.jpg
 
Punity said:
I just screwed mine straight through the insulation, less hassle that way.

I can definitely see how this would make my life easier..... I only used 3/4" r4 board so I think 11/4 screws would actually work well if I do I go straight through the board. Thanks !!

Revvy said:
I just carved out the 4 squares where the bracket extended in the foam, screwed it into the wood, and then, what I don't show for photo purposes is I wedged the foam piece I cut away back over the bracket.

I like that regulator manifold set up.... Mines a bit different than that my regulator is at the tank itself only a single regulator that I split using a co2 manifold between 3 tanks. Not ideal but I've found tricks to carb the new tanks while maintaining pressure at the other 2 for serving. I know it's easier to go through the foam board but I actually think your setup directly to the wood is probably more stable...... I commend your skill at cutting those small squares out for the mounts.
 
Seconding the clear silicone caulking for air gaps. That's the best way I've found without voiding warranties. I used it on my first two freezers, and have a few tubes laying just in case the third one needs it.

I would have stuck with the 1-1/4" wide weatherstripping and just trimmed the excess off carefully with a fresh blade in a razor knife.

Finishing up my 8-tapper, and using that same black 1-1/4" stripping. Though I have a 2x10 collar with 1x12 face over it, so I have more bearing surface than you do.
 
thadius856 said:
Seconding the clear silicone caulking for air gaps. That's the best way I've found without voiding warranties. I used it on my first two freezers, and have a few tubes laying just in case the third one needs it.

I would have stuck with the 1-1/4" wide weatherstripping and just trimmed the excess off carefully with a fresh blade in a razor knife.

Finishing up my 8-tapper, and using that same black 1-1/4" stripping. Though I have a 2x10 collar with 1x12 face over it, so I have more bearing surface than you do.

Yeah in hind sight I thought that I should have kept the full face covered with the 11/4" stripping and trimmed the excess from the inside portion. Hind sight is 20/20 as they say. I was happy though with the caulk though, it definitely sealed those gaps and after I put the insulation over that hopefully no moisture will get to the wood. I'm also running a Eva-dry E-333 silica dehumidifier and a tub of damp rid so, am I going over board maybe but I'd rather it be bone dry in there than to get rot or mold growth.

This is where I'm at now ( you can see the caulk filled gaps on the one side still )

image-1129202529.jpg
 
I also added a thin board on top of foam then screwed in secondary! Just trust your own self and go with your gut feeling if it will work or not! You've made it this far :)

image-36219404.jpg
 
Ok I'm DONE !!!!! pics to follow but one last quick question..... I used PL300 foamboard adhesive to adhere the foam board to the inner collar..... What's a good rule of thumb for that stuff to cure and for me to turn the freezer now a keezer back on ? I know on Loctite's website it says full cure at 7 days but.. My BIL who is a builder says that is a blanket statement as they do not know if it is exterior mount, interior mount, in Jamaica or in antartica and temp/humidity makes cure times vary based on all those variables. He seemed to feel like grab time with 1-2 hours and full cure within 24-48 hours at room temperature in upstate NY. does this sound about right or should I wait longer to turn this bad boy on ? Pics will follow very soon and thank you everyone for the help so far.
 
I would say after a day at room temp you should be fine. I sprayed mine with loctite adhesive and let it sit a day worked like a champ.
 
Punity said:
I would say after a day at room temp you should be fine. I sprayed mine with loctite adhesive and let it sit a day worked like a champ.

Yeah and I've had it on and clamped down since Saturday night... I'm gonna roll with it and turn her on. Thanks for the input.
 
Ok here's the final pics... The only thing I haven't done yet and it's stupid is just mount the temp control to the collar but the probe is in place and its operational.

image-2175499550.jpg


image-3357531877.jpg


image-2404559436.jpg


image-3390627652.jpg


image-423428703.jpg
 
Back
Top