HDIr0n
Well-Known Member
All triclover. Still need to pipe water to the tube and shell chiller and need to pipe the gas line for the jet burners
Ok, you are going to have to give some detail on that man! :rockin:

All triclover. Still need to pipe water to the tube and shell chiller and need to pipe the gas line for the jet burners
SS_Brewing_Co said:All triclover. Still need to pipe water to the tube and shell chiller and need to pipe the gas line for the jet burners
All triclover. Still need to pipe water to the tube and shell chiller and need to pipe the gas line for the jet burners


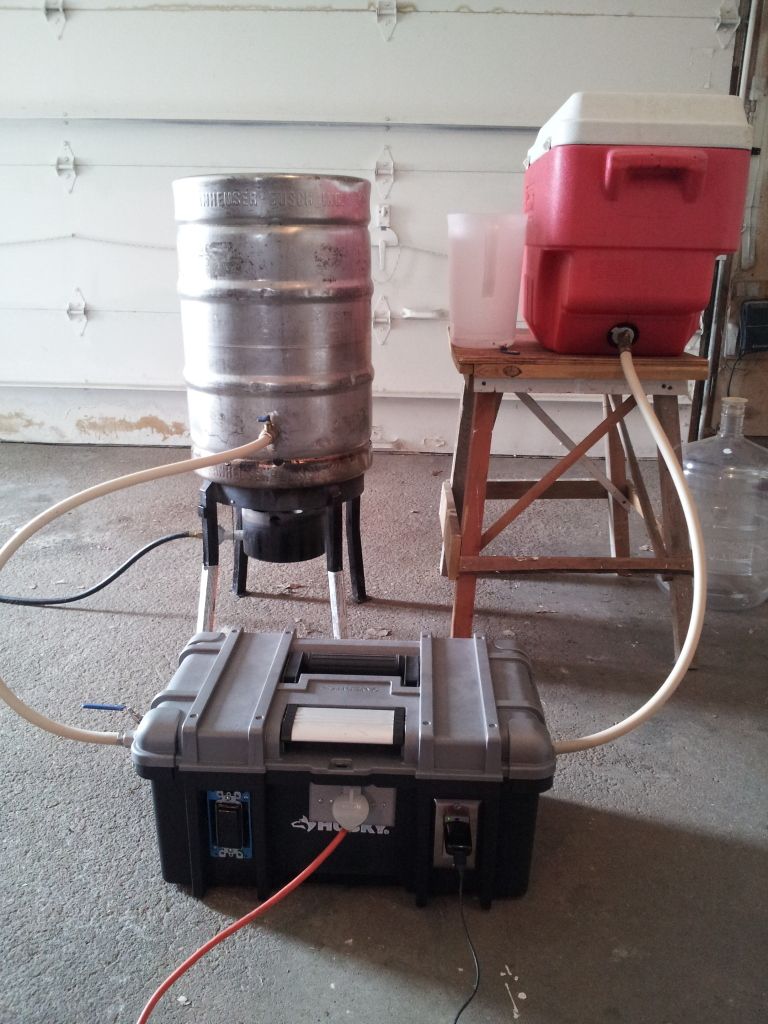
Here is my nearly complete brewery. Using the BCS-460 for control.

Hi all, new poster to this forum. Here's my new 4v HERMS nearing completion.
There's some very nice rigs in this thread. And some innovative ideas.
Cheers,
Cam.
4 Vessel HERMS
It's the heat exchanger


I dig those mounts, especially the chiller mount. Nice work!


OK finally done my gravity feed brew rig.


Where did you get your kettles?So this is my Brew Bench that my boys and I came up with. It's a common design but I like it as it is designed with the garage brewer in mind!
We added provisions so that the kettles are tight to the bench but can un-clamp fast for easy cleaning.
We only have a few more details to finish as overall we want everything that has to do with this bench and brewing to fit within the footprint of the bench. That means everything stores on the bench so that it isn't scattered all over the place. Then put the cover on and push it into the corner of that garage.
Next is process control design. Our intentions are that you can run this with your iPhone, Android, or tablet. We intend to sell these in the future.
 Love this hobby! I have since reinforced the mash tun tier with 45's.
So this is my Brew Bench that my boys and I came up with. It's a common design but I like it as it is designed with the garage brewer in mind!
We added provisions so that the kettles are tight to the bench but can un-clamp fast for easy cleaning.
We only have a few more details to finish as overall we want everything that has to do with this bench and brewing to fit within the footprint of the bench. That means everything stores on the bench so that it isn't scattered all over the place. Then put the cover on and push it into the corner of that garage.
Next is process control design. Our intentions are that you can run this with your iPhone, Android, or tablet. We intend to sell these in the future.
Made from 100% materials headed for the dumpster at work. Base measures 18" x 40". Didn't cost a penny. only took 3 hours to build.
I would like to know about the kettles as well. The stand looks great also.
These are Bayou Classic 8 gallon kettles. They come in larger sizes as well. They make two different kinds of kettles. The ones with the rolled ridge at the bottom are much nicer and if you use a false bottom it rests on this ridge.
I saved a lot of money buying them from walmart.com online. They are not light duty and they come with weldless hardware and a stainless valve.
Hope this helps!
Looks very close to the setup I want to do. I notice your mash tun has thermometer in the side, does that work well and how did you seal that in there?Just finished her up this afternoon

Damn...not available from Wally world right now
They are available online at WalMart....all the way up to 40.5 gallon for $499!
(Full disclaimer: I do not have a reciprocal agreement with WalMart, however, I do have a very small ownership stake in WalMart...as in, if I sold my shares I could probably buy a few shopping carts with the proceeds).

Enter your email address to join: